
"If I had to choose, I would rather have birds than airplanes." Charles Lindbergh
In the previous blog, the importance of knowing your bird and basic bird flight mechanics was discussed. The point to emphasize is that much time in the field and countless shots are necessary to improve your bird flight images. That latter statement probably goes without saying, but implied in the meaning is that this often requires you to sit (stand) in one place for long periods of time. In other words, you must learn to anticipate your shots and be patient. Even after going back to the same rookery dozens of times over several years, I still anticipate capturing a better shot than the previous.
Knowledge of your subject will help you get there; after that it's all about how you use your camera. First, the lens. I mentioned in the previous post that I can fill the frame with a flying pelican from a distance over 100 feet using a 400mm lens. Clearly, a telephoto lens is essential to photograph birds in a rookery. The distance between you and them will be necessarily great (there are exceptions of course). Recommending a specific brand or model of telephoto lens is not my place. But I can share with you my preferences. Since I am in a canoe, I prefer a handheld lens with a focal length of at least 400mm. And in the case of the bird rookery where sometimes I require less than 400mm, I prefer the flexibility of a zoom lens over a fixed prime lens.
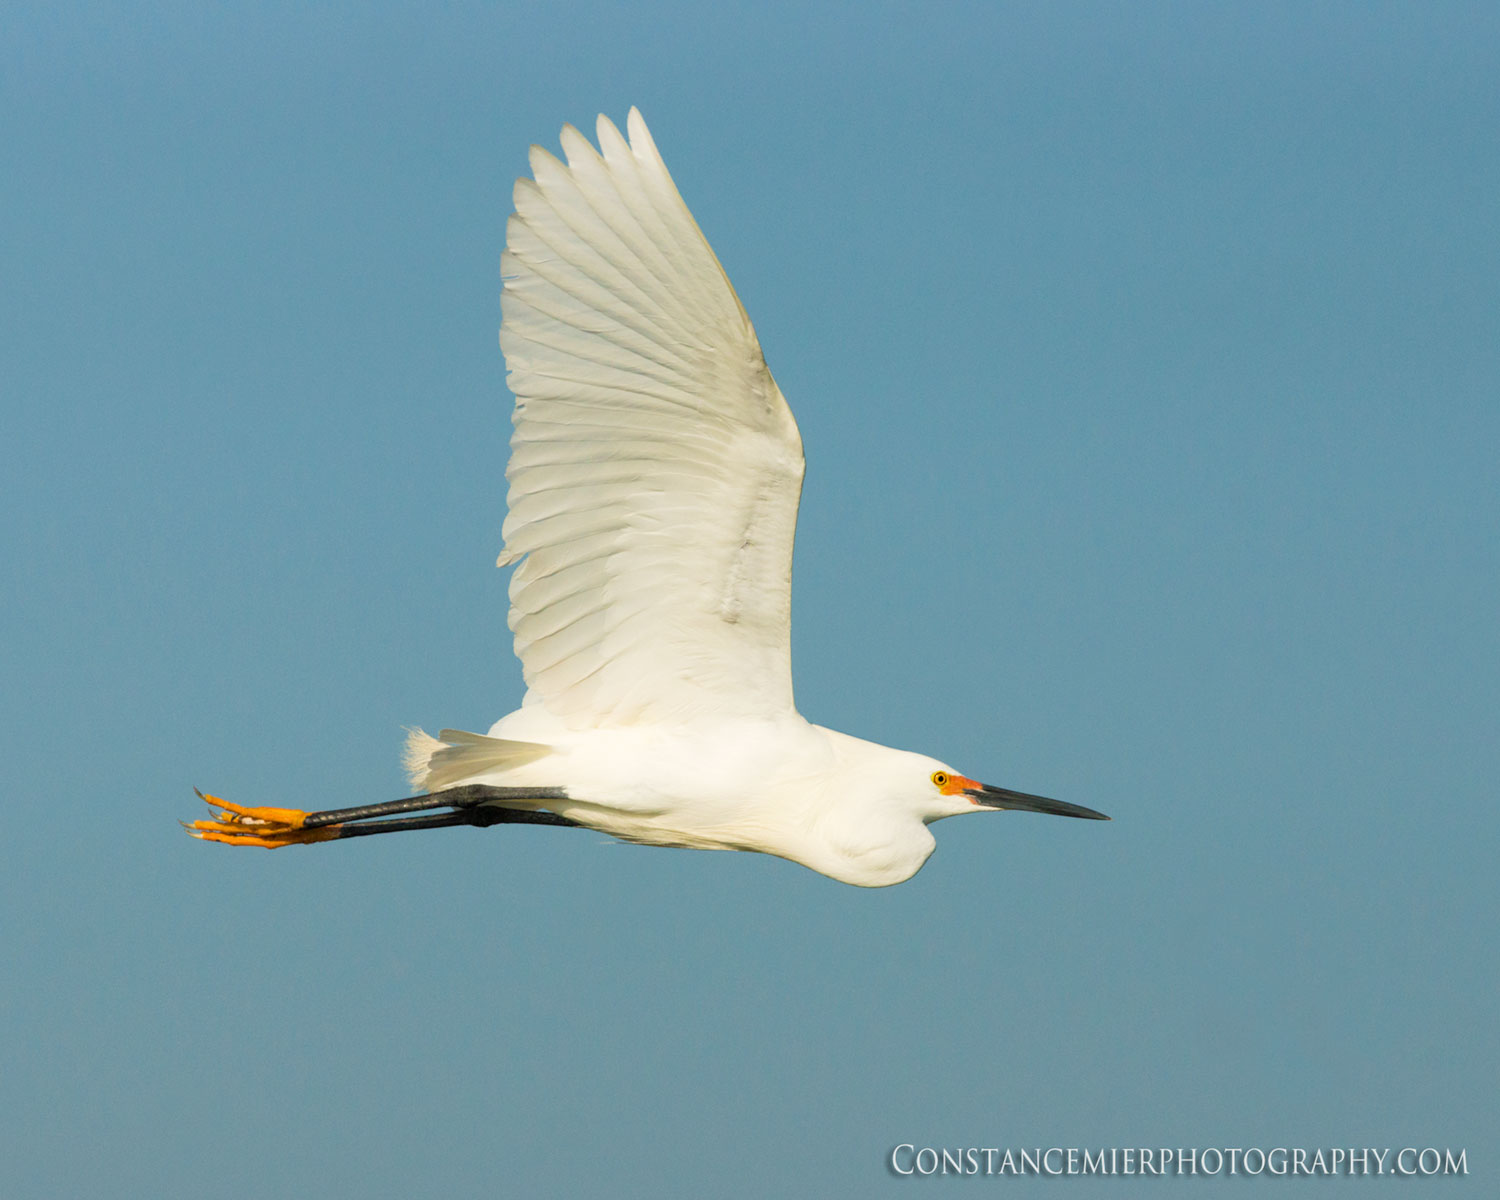
At this particular rookery, I go back and forth photographing white-feathered egrets and brown pelicans. Because of the differences in feather color, I have to adjust the exposure constantly. On average (with some variation of course), adult brown pelicans require about 2/3 to 1 stop more light. For example, here are two images taken within about six minutes of each other. The exposures settings for the brown pelicans were aperture = f8, shutter speed = 1/1250 and ISO = 640. A few minutes later, I changes my settings to capture a snowy egret. To do this I increased the shutter speed to 1/2000, a reduction in light by 2/3 stop.

A few things about exposure. First, brown pelicans do have white feathers. Consequently, you run the risk of blowing out the whites when exposing for the brown feathers. As always with the camera, there is a compromise. It is often recommended that if you err in exposure, err on the side of overexposing. This is because it is easier to darken slightly overexposed white feathers than it is to lighten dark feathers that are too dark. Details in a slightly overexposed white feather can be saved with some selective burning (darken). On the other hand, if you underexpose dark or shadowed feathers, it is near impossible to get back any detail. The best way to figure this out on your camera is of course, trial and error. Most importantly, get use to referring to your histogram when you begin shooting and then make the correct adjustments before continuing.
Another point about exposure is that while I prefer manual mode, aperture priority mode might work as well in these conditions most of the time. The reason being is that when I change the exposure, I change shutter speed and keep the aperture constant. That is essentially what aperture priority mode does for you automatically. So why don't I use that? One reason is I prefer to be in total control over my exposure settings and depth of field. Sometimes, I need a greater depth of field to get an entire bird in focus or when there are more than one bird in the scene. To change depth of field, I must change the aperture setting. Here is an example where I would prefer a depth of field that is great enough to get the chicks and parent in focus.

The final point about exposure has to do with time. Typically I begin shooting at the rookery minutes following sunrise and continue shooting until about 10 am. As the sun rises higher, it offers a greater amount of light. Generally, I want to keep my shutter speeds at or above 1/500 (with a focal length of 400mm, the minimum speed should be 1/400) and prefer at least 1/1000. With aperture settings between f5.6 to f9.0, I need to begin the morning with relatively high ISO settings, beginning with 800 and eventually decreasing to 400 or less. Occasionally, I will go higher than 1000. Here is an image taken minutes after sunrise at an aperture of f5.6 and shutter speed of 1/500 and ISO at 800. Notice the bird has a foot missing.

Once I have my images downloaded and sorted, I begin the post-processing stage for each image. Typically, it may be nothing more than simple dodging (lightening) of selective areas that are slightly underexposed. With birds in flight, it is almost inevitable that some portion of the bird will be shadowed. This is why early morning hours are best for flight shots as the sun lights up the underside of the wings and torso. Basically, the angle of sunlight will determine the location and amount of shadows on the bird.
Here is an example of a pelican captured during early morning. Notice that with this banking position, all the bird's feathers and torso are in good light; very little selective dodging was needed for this image.

You will see changes in your images throughout the morning as the angle of the sun increases. You can try to minimize the shadows by positioning yourself with the sun behind you and slightly to your left or right, and avoiding harsh overhead lighting that comes in late morning hours. The bird's position will also affect the outcome. As an example in the image below, the bird's body was turned enough toward the sun (which was to my right and slightly high) to illuminate the torso and most of the tail feathers and left scapular feathers. The primary and secondary wing feathers were in a horizontal flat position, which caused the underside of them to be shadowed.

Selective dodging of shadowed areas should lighten up the shadows enough to bring out the details. To illustrate how that might look, here are before and after images. Note the details in the shadowed torso are seen with some dodging to that area.


Here is another example where angle of the sun affected the shot. The sun was obviously to my left, but with correct exposure and selective dodging, details in the feathers were maintained.

Capturing a bird in flight is one of the most challenging tasks for a bird photographer, but for obvious reasons can be the most rewarding. The bottom line is, practice, practice, practice. At the very least, you'll have fun watching the birds.
"It's impossible to explain creativity. It's like asking a bird, 'How do you fly?' You just do it". Eric Jerome Dickey
No comments:
Post a Comment