Monday, May 9, 2016

The Challenges of Photographing from a Canoe: Part II


In the last post, I shared my method of using a tripod to capture waterscapes from the canoe. Since the focus of that entry was on a particular area, I'll continue with that and discuss the challenges of that place; namely, its lack of drama. But to its credit, where it lacks drama, it excels in tranquility. So, how does one photograph this area and make is appealing?

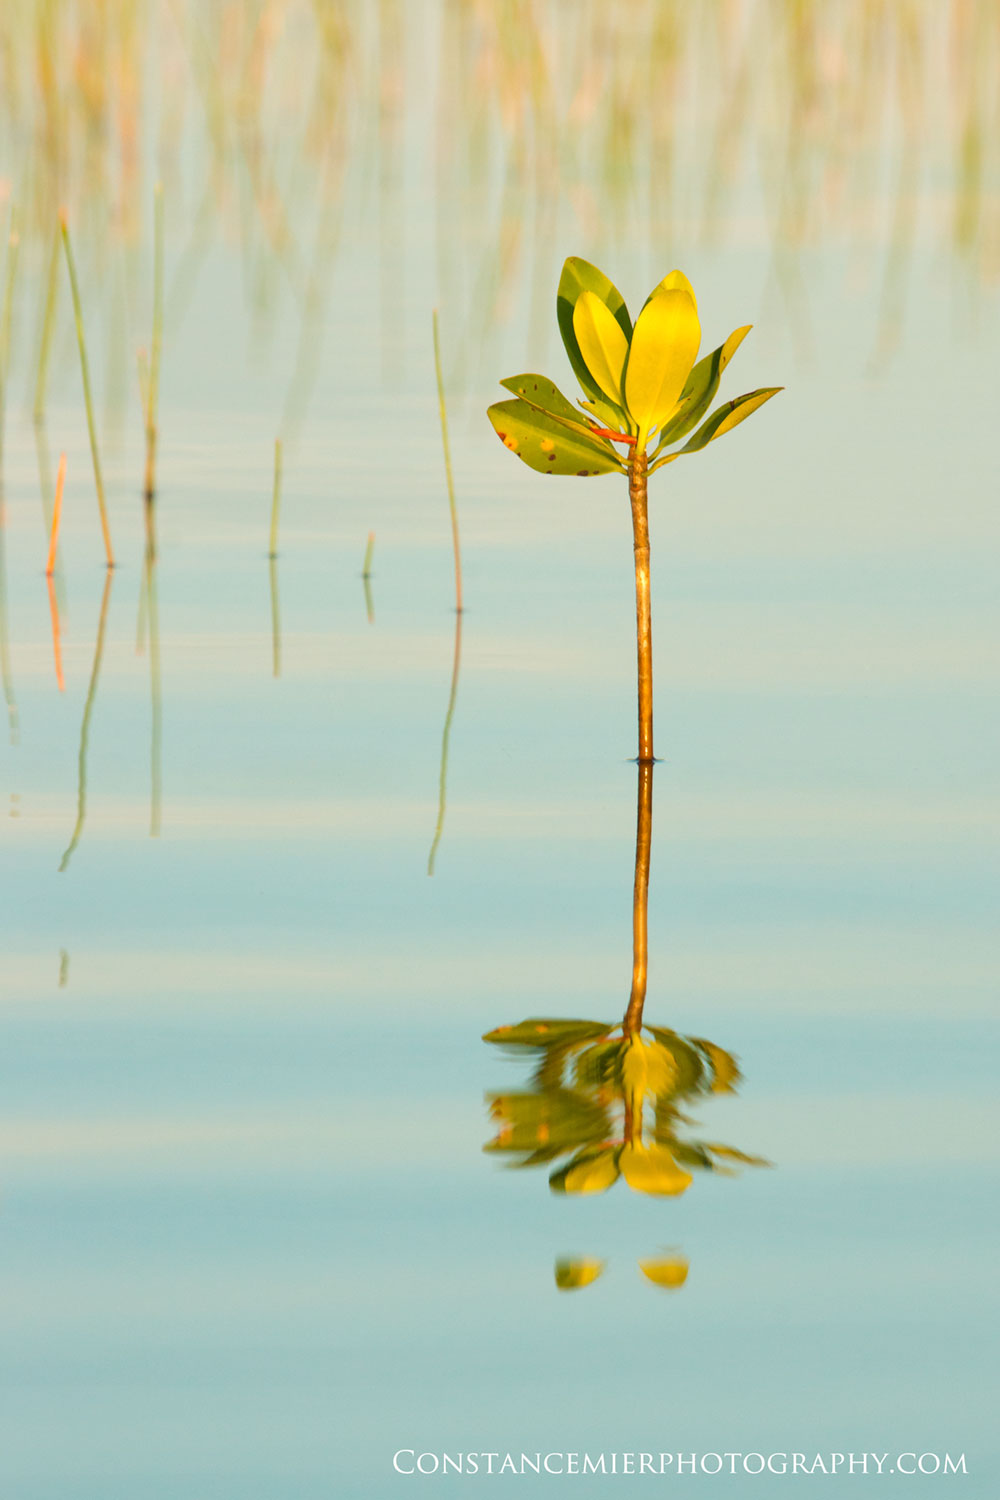
Landscape or waterscape images stand out if they contain the following (this is not definitive, just my take on it); dominating clouds, interesting foreground, leading lines or curves, dramatic light and/or colors (especially red and yellow). When all or some combination of these elements are present, it can make a landscape image very compelling and sometimes powerful. But the elements have to work well together to make that happen. On the other hand, an image can be subtle and still work if the elements come together in harmony and provide a mood. Look at the image below. Do you see any of those elements? Clouds? Inconsequential. Dramatic light or color? No. Interesting foreground? Sort of.  Leading lines? Kind of. The little mangrove serves as foreground and may be the most interesting part of the composition. But, by itself it doesn't balance the composition. That's where the grasses come in. In addition to balance, they do offer diagonal lines that help guide the eyes into the image. While this scene is neither dramatic or powerful, it does, in my mind, strike a calm mood.


If peace and tranquility are what I have to work with, I have no problem with that; after all that is what I feel when I am here. But the subtlety of this landscape makes this so challenging. To overcome this, I try to bring those elements into my images as much as possible. What comes to mind immediately is that you have to capitalize on the Florida sky, which can offer drama and color. Add some water to that with the reflections and now you got something. It doesn't always happen that way. Consider the next image. The fog filled the area during early dawn; consequently, there was no dramatic sky color. I had found a spot where the water trails curved through the scene and set up my tripod. Because of the heavy fog, the sun light was dampened, creating an interesting mood, which I found appealing. No drama here, but very tranquil.

Sunrises only last a few minutes, so I often find myself wandering this area under a bright, cloudless sky looking for something compelling to capture. One day, I noticed the reflections in the water from the ripples created by my boat. Wearing polarized glasses, I was immediately taken in by the golden hue created by the sun's reflection. I put the polarizer filter on the lens and started "playing" with water movement. At first, I used this to create abstract images, such as this one.


Then it occurred to me that maybe the water movement could add an element to an otherwise dull scene. The ripples emanating from my boat can become a foreground interest. So I rocked the canoe and came up with this scene. The grasses once again serve as leading lines, which also work well with the cloud formations.


For some reason, I find that vertical compositions work well. I see the scene in thirds, the sky at the top, the water ripples at the bottom, and the grasses and mangroves in between, like this scene.


The idea has potential. The sky is key to the scene, so there has to be clouds. Dramatic cumulus clouds were passing across the sky quickly, so I attempted to capture the scene as seen here.


Minutes later, the big clouds disappeared leaving behind the less dramatic wispy tails. Using fast ripples, I attempted to create symmetry with the sky, as seen in the image below.

My final thought on all this is that certain landscapes just stand out and take our breath away; but here in south Florida the landscape is understated in many places. Rather than jump out at us, it creeps up on us. It is not so much the 'wow' factor as much as it is the mood it strikes in us. The way I figure, if there is something that attracted you to a scene in the first place, why not learn how to create an image that best conveys that attraction? What better way to learn composition and hone your creativity. That's the lifelong journey I am on, by way of canoe.


Friday, May 6, 2016

The Challenges of Photographing from a Canoe: Part 1


Wildlife, or more specifically bird photography has been my repertoire for over ten years. But, in the past couple years, landscape (waterscape) photography has become a greater focus. I've always used a wide angle camera while paddling the canoe; but what I mean by focusing more on landscape photography is that I am using the tripod more often. In some places, I can easily step out of my boat and stand in water with the tripod; Chokoloskee Bay and Biscayne Bay for example.


But there are some areas in south Florida where stepping out is impossible, unless you wish to sink up to your eyeballs in soft mud. I frequent a location where air boats once roamed and now the defunct trails serve as passages through a large marshland where I can paddle in shallow waters. I love this area and find the low profile intriguing, but very challenging to photograph (for one, I cannot step out of my boat). But, when I am there, alone, it is a place of peace. I want nothing more than to capture that sense of feeling. I wander around the maze of low lying mangroves and grasses searching for interesting compositions. I rely heavily on the sky and sometimes it delivers interesting cloud covers; but not always. Foreground subjects and leading lines can be elusive elements to a composition in this area. But, I keep trying; and here is how I do it, without getting out of my canoe.


Step 1. Explore. I typically launch my canoe in the darkness before sunrise. I arrive at my location after about 15 minutes of paddling just before sunrise. Then I search for the right location to stake out. Once I stake out, it is not easy to move to another spot (as you will see in a minute), so I have to choose well. Because of the low lying foliage, I don't have an ideal perspective from my sitting position, so I carefully stand up and look around. This gives me a wider view of the landscape and helps me decide on a location. I am also challenged by the changing light and must anticipate how the sky will appear over the landscape.


Step 2. Stake out. Once I know where to plant myself, I stake out the canoe. I have two looped ropes attached to the gunwales; one in the front on the right, one behind me on the left. I thread a stake out pole (Stick It Anchor Pin) through the loop and stick it into the ground. Each pole is against the boat so that very little movement is possible. The canoe now becomes a stable platform for me to stand.


Step 3. Set up the tripod and camera. I attach the ballhead to the tripod. I stand up, open the tripod legs and place them in the water. Two legs are planted against the side of the canoe so that I can get as close to the camera as possible once it is attached. I then sit back down and grab the camera from the pelican case. I attach the filter holder and cable release before attaching the camera to the ballhead. Holding camera, I stand up and carefully attach it, making sure that the plate and ballhead adjustments are tight. Now I am ready to shoot. Once I know which filter(s) to use, I attach them as needed.


Step 4. Taking the shot. Now I can stand up in the canoe and control my camera. I have an advantage with the Sony Alpha camera in that I can swivel the LCD panel out to see the image without looking through the viewfinder. I use Live View as this allows me to see the image as it will be exposed. I always have the histogram in view as well and rely on it for exposure settings.


The obvious disadvantage is I can't move easily from that spot. Ideally, you want to "work the scene" and move around to find the best composition. This is why it is so necessary to survey the area well before setting up. I've been here several times to know the place. Despite this, the light changes constantly, clouds continuously form, everything changes and you have to adapt and move. When I look at the scenes I captured, I often think about how it might have been improved had I been a few feet to the left or right or more forward or backward.


Obviously, this is not for everyone. But consider that in Florida, water is everywhere and sometimes you have to get in it to photograph it. A canoe is one way to do that and open up a world that few photographers have experienced. By sharing my method for photography from a canoe, I hope to get you thinking about the possibilities. Next entry will continue to focus on this particular area and how I use water movement to compose an image.


Saturday, April 2, 2016

Low Tide Blues


For over twelve years I have been exploring the Ten Thousand Islands and have spent over 100 nights on those islands, somewhere out there in the gulf waters. Amazing how each island has its own personality with several moods. The ebb and flow of the tides alters the island's mood significantly. I find low tide to be the island's invitation to get to know it better by revealing its secrets after the water has flowed away. This is when I love to photograph the beach.


My photography has evolved over the years and now, I place greater emphasis on capturing the island views when I go out there. I always bring a tripod and all the equipment I need to capture waterscapes and beach views. Wide angle images work best with a full size sensor, which I do not have. So my attempts to go wide have required me to overcome my cropped sensor camera's limitations and take more images with the intent of stitching them together. Sometimes it works, sometimes it doesn't. The image below is made from two shots.


I've also pushed the limits of my filters by combining a circular polarizer with the neutral density filters. This gives me more opportunity to photograph long exposures during those midday hours, like this one below, two images stitched together.


Camera and post processing skills are one thing, but it all comes down to the subject. To me, capturing low tide scenes is tricky. The tidal landscape can be very messy and chaotic, making it difficult to compose an image. Leading lines and a strong foreground subject are often not available. Tidal pools can lack a pattern and can break the sky's reflection into little pieces interrupted by beach stuff. The image below and the one at the top are perfect examples of the tidal chaos typical for these storm-worn beaches.


Then there is the sky. In winter, the sky is often devoid of clouds at about the time of sunrise or sunset, which doesn't leave you much to work with. On the other hand, this year has been challenging in an opposite way with cloud cover that went from being very dramatic to very lackluster within minutes. Whatever I have to work with, I try to capitalize on the water reflections and get some kind of foreground into the composition. I try to get the cloud patterns to complement the foreground patterns and give balance to the image.


And here's the other thing, you never know what you're going to get when you arrive on an island. I pay close attention to the placement of the sunrise or sunset relative to the beach and I know the tide schedule. And I keep up with the weather forecast. Despite all that, I try not to have any expectations when I get out there, because it rarely is what you expect. I guess that's part of the fun, going with the flow, or the ebb. Whichever.


Wednesday, March 23, 2016

Bird Photography Bootcamp


I've learned a lot this month. I recently strayed from my usual and traveled to Costa Rica. I went there with professional nature photographer, Bill Gozansky, who set me up at the La Laguna del Lagorto lodge, deep in the rainforest. He was my guide and teacher for four days. We packed in three full days (from sunrise to sunset and sometimes after sunset) and one half day at the lodge. While I was able to photograph a variety of animals, birds were greatest number, especially tiny birds.


I am a wading bird photographer, so my training has been relatively narrow when it comes to birds. Going to Costa Rica to photograph birds was kind of like a powerlifter deciding to become a runner.  I basically attended a "bird photography bootcamp" that challenged my skills in many ways and made me re-evaluate my photography techniques.


One challenge was background, an important element of bird photography. In the rainforest, everything is lush and green which can be very pleasing as an out-of-focus background. But it can also be very busy and contrasty. My first piece of learning was finding the right position and waiting for a bird to land in the frame.


Most of the birds I photographed were small, quick and unpredictable.  It wasn't until I examined each image from home that I began to see my errors. What I thought was a great shot ended up being placed aside as I noted an out-of-focus head and in-focus torso. Despite attempting to keep the focus directly on the bird's eye, sometimes I just didn't hit it right.


The other experience I had that was so unlike my typical bird photography days here in south Florida was the use of flash, which was almost entirely necessary. The rainforest can be very dark and shadowy and clouds often filled the sky. Low lighting was typical. While I never connected with flash photography for birds well, this experience, along with advice from Bill helped me to overcome my "fear of flash". The result was a collection of new images of beautifully colored birds that I can proudly display.

What resonated most was that I need lots of practice and I need to always be comfortable with my camera and lenses, especially the flash. Nothing about camera equipment should be intimidating to you if you want to be the best photographer you can be. My take-home message is: learn your camera, try new things such as flash, various focus modes, or if you haven't yet, use manual mode. The camera is a mere tool that you require to re-create your vision, you are in total control of it.


Wednesday, February 10, 2016

Sun Bursts


Photography is a continuing learning process both in terms of technique and creativity. In a significant way, the process is about acquiring tools and tricks, some of them tangible. For instance, since getting more interested in land/waterscape compositions and using a wide angle lens, I have acquired several "gadgets" that lend themselves to the creative process. The most obvious among these are the filters.

Gadgets aside, there are plenty of "in-the-field" technique tricks that I have learned along the way as well. I sometimes think of them as recipes. One recipe is for making a sunburst by using a very narrow aperture, such as f20 or f22. By narrowing the opening through which light enters the lens, light diffracts or bends around the edges of the aperture blades. The more blades in the lens, the more rays created. This effect works best with a wide angle lens or low focal length. The effect is very nice and sometimes quite spectacular looking. A sunburst can add some life to an otherwise boring sun. This could be one that is relatively high in the sky, such as this one.


Or it could be when the sun is low on the horizon and the chances of capturing a colorful sky are higher. Here in Florida, clouds are almost always present. Clouds can make or break a sunset or sunrise image in my opinion. For instance, during summer I often look east over Biscayne Bay to capture the sun rising over the water. What I am typically seeing are low lying clouds directly over the horizon line, covering the rising sun. The result is often a lack of color or specular light (those rays that shine through the cloud breaks). If you get lucky, the clouds are separated enough to allow some of the sun rays to shine through. Add some color to that and it can be amazing. This is also when creating sunbursts can add interest, such as this image recently taken on Biscayne Bay. The sky that morning was not particularly colorful because of the low lying cloud formations, but adding some burst to the sun as it eventually peeked through the clouds created a focal point of interest and helps balance the composition with the two rocks in the foreground.


Trees or rocks in the foreground that offer an opening for the sun to peek through can make a sunburst more interesting. Here in Florida, we have lots of trees. If it is a waterscape the tree will most likely be a mangrove, such as this little one on Biscayne Bay. I created the ripples in the water.


It sounds too easy to make a sunburst in the field. So what is the catch? First of all, narrowing the aperture to f20 or f22 reduces the light significantly. This requires an adjustment to the exposure, either increasing ISO or reducing the shutter speed. I mostly capture waterscape scenes and much prefer long exposures anyway, so a narrow aperture actually assists in that. Photographers talk miles about how a narrow aperture reduces sharpness because of the diffraction of light through a narrow opening. But honestly, I don't see that, I believe it had more to do with the lens quality. With the right lens f20-22 should not be a noticeable reduction in sharpness. The bottomline is, I see no noticeable compromise when setting the aperture to f 20 or f22. Next time you are our photographing the sun, think about the sunburst and give it a try. If you are use to shooting at f8 or f11, consider that you will need 2 to 3 stops more light when you reduce the aperture opening to f22. This will most likely require a slow shutter speed, so make sure you got your camera on a tripod.

Monday, January 18, 2016

Web Designs


Nothing technical here. This is about the Big Cypress in the early morning after a hard rain. It is about paddling gently through a grassy prairie covered in delicate spider webs. It is about those dewy webs that sparkled like diamonds in the foggy haze of the sunrise. I was taken in by the abstract beauty of the web designs and couldn't decide if I preferred frontlit or backlit webs more. Either way, I wanted to photograph them. Thankfully, I brought my macro lens.


 I experimented with several ways of capturing the interesting designs of thin white web lines heavy with water droplets that hung like little jewels on a necklace. The repeating reflections in the tiny droplets were subtle, as is the landscape. As a result of the low lying landscape, creativity is challenged as I wander around assessing the morning light on the grasses and trees and their reflections in the shallow water.


This is where my macro lens comes in handy because sometimes you have to move in and look closely.


So I played with the spider webs, never seeing a spider. Mostly, I handheld my camera, confident in the sharpness of the lens. To enhance the sharpness, I stayed within the len's aperture sweet spot which is f8 to f11. With that range, I had a relatively narrow depth of field for these complicated spider webs. I decided that limiting the DOF could make the web compositions more interesting, though challenging. For this, I focused on a strong point and built the composition around it by moving the camera this way or that until I found one I liked. With parts of the web out-of-focus and some of it in focus, composition was key. Background was often distracting and the reason for not composing an image as I went in close to fill the frame with only the web.


 I was also attracted to the low lying webs that hung over the water and their reflections.I tried some images that would include the reflection, but often times a grass poked out of the water and interrupted the web.


I found a beautiful web on a mangrove tree high above the water. I decided to set up the camera on the tripod next to the canoe and attempt to capture multiple images with varying focus points (later to be stacked into one image). This was not easy as there was little room for setting up in a good spot. But, I managed to hang over the edge of the canoe to see the image through the view finder. While viewing, I used manual focus and focused on the left side of the image. Then I worked my way to the right while adjusting the focus point to get a total of nine images. I used the cable release to minimize movement. Once at home, I put the images together and while the focus stacking software worked well, there was an out-of-focus branch that I was not able to avoid. With some significant cropping, I got this image.


Once I examined the images at home, I was amazed at the variety that can be captured. What a productive way to push yourself creatively and technically. As always, when I have my first encounter with a photo subject, I see it as a jumping off point and begin to strategize my next encounter. Such is the Big Cypress.


Wednesday, January 6, 2016

The Everglades is beautiful, but...

  I recently finished a 4-day trip through a part of the Everglades known years ago as the Bill Ashley Jungles. All within the park, this complicated area is lightly speckled with chickees from Pearl Bay to Watson River. Daily distances traveled between them can be as little as three miles; a perfect set up to spend more time exploring. This is an area of the Everglades that was once known to only the heartiest of the gladesmen, the hunters and fishermen of days long past. Now with satellite images and GPS, the less heartier can manage to get into the jungles; but many still get lost.


In addition to exploring new routes, I wanted to photograph. Without expectation, I was on a quest to capture the landscape. To pull it off, I needed two important elements, clouds and a foreground subject. I've been in here many times, but these elements have mostly eluded me. You see, this area of the Everglades is quite challenging for several reasons. One reason, it is flat. No matter where you are, water and sky dominate, leaving little room for anything except for a thin line of mangroves to separate the two. Harry Truman once said of the Everglades, "Here are no lofty peaks seeking the sky, no mighty glaciers or rushing streams wearing away the uplifted land." He got that right.


This is by far not the first choice for a landscape photographer to pad her portfolio. Doubtful you will see many images of this low lying maze of mangroves and water on 500px among the glorious mountain ranges, dramatic rocky shorelines or picturesque waterfalls. If you really want to photograph this part of the Everglades, your best hope is for clouds in the sky. The Everglades produces dramatic skies which can go up against a mountain range image most days. But, they are unreliable and infrequent during winter months. 


Strong foreground subjects are few and far between in these parts. Best bet is to come here when water levels are relatively low so the grasses and sea floor patterns are revealed. Or maybe get yourself into a spot where a small mangrove tree stands alone. Without an interesting sky as background, you have very few strong elements to place in a landscape image. Sounds fruitless in every way, yet there I was.


And I have very little to show from this trip. It was a short trip comparatively and the wind was relentless. It was the wind that kept us on the chickees in the afternoon; no reason to go back out and explore the area to find an image when there are 20-25 knot winds blowing. At least on Lane Bay chickee I was able to photograph the wind-driven water. The wind created froth trails and with those afternoon cumulus clouds in the sky, I was attracted to the scene. The trails offered leading lines that worked well with the clouds. I attached a 50-lb water container to the tripod to secure it and attached filters to the lens under the midday sun. Using 2-sec exposures, I proceeded to capture the water as the wind drove it toward the chickee. That was about as exciting as it got behind the camera lens.


So why bother? It's the challenge of the off-the-grid Everglades that keeps me going. Take a look at the satellite image above. It's the Everglades, that's why.